Installing the Java Development Kit (JDK) on a Windows operating system is essential for aspiring or seasoned Java developers. The JDK is a fundamental component for building and running Java applications, and without it, you’ll be unable to harness the power of this versatile programming language.
This comprehensive guide will walk you through installing JDK on Windows, ensuring you have everything you need to confidently start coding, testing, and deploying your Java projects. Whether you’re a beginner taking your first steps into Java programming or an experienced developer looking to set up a new development environment, we’ve got you covered.
1. Remove all previously installed JDK/JRE versions:
If you previously installed an older JDK or JRE, you should remove it by following these steps:
• Go to the “Control Panel”
• Select “Program and Features”
• All programs beginning with “Java” must be uninstalled, including “Java SE Development Kit…”, “Java SE Runtime…”, etc.

2. Download JDK
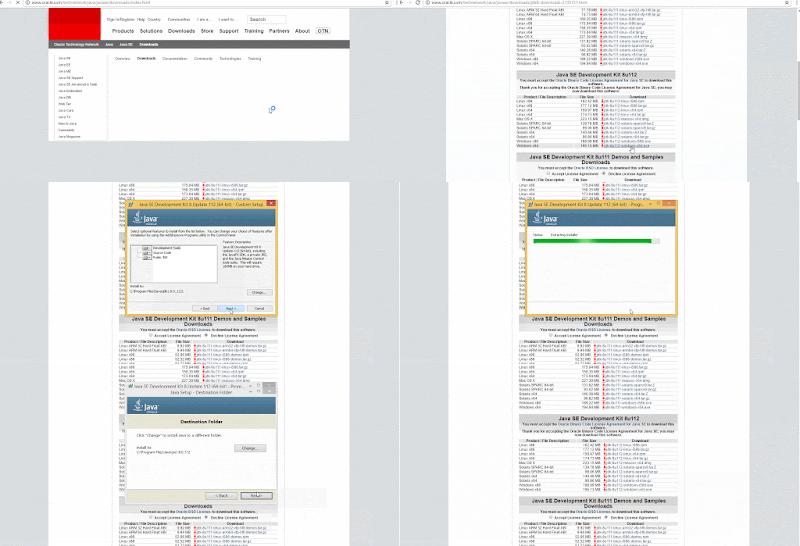
• Click on the “JDK Download” option under “Java Platform, Standard Edition,” where “Java SE 8u” is the most recent update number.
• “Accept the license agreement” must be checked.
• Select the operating system you want to use, for example, “Windows x64” for a 64-bit Windows operating system or “Windows x86” for a 32-bit one. The “Control Panel” “System” menu option under “System type” allows you to determine whether your Windows operating system is 32-
bit or 64-bit.

3. Install JDK and JRE:
• Run the downloaded JDK and JRE installation (for example, “jdk-8uxx-windows-x64.exe”). By default, the JDK and JRE are installed in the “C: Program FilesJavajdk1.8.0_xx” and “C: Program FilesJavajre1.8.0_xx” directories, respectively, where xx indicates the most recent update number.
• Examine these folders in Explorer to see where the JDK is installed. Note the location of your JDK installation, as you will need it in the next step

4. Include JDK’s “bin” Directory in the PATH:
For executable programs, the Windows operating system checks the current directory and the directories listed in the PATH environment variable. The JDK programs are located in the “JAVA_HOME>bin” folder (where JAVA_HOME> indicates the installed JDK folder), including the Java compiler javac.exe and the Java runtime java.exe. Add “JAVA_HOME>bin” to the PATH to start the JDK programs.
Follow the procedures below to change the PATH environment variable in Windows XP/Vista/7/8/10:
• Click “Advanced system settings” under “System” in the “Control Panel” window.
• Go to “Environment Variables” in the “Advanced” tab.
• Scroll down to “System Variables” and select “Path” and “Edit…”.
• Within Windows 10: A table of the current PATH entries is displayed. Select “New.” Enter the JDK binary directory in “C: Program FilesJavajdk1.8.0_xxbin” (NOTE: replace xx with the update number of your installation). ⇒ Choose “Move Up” to move it up.
5. Check the JDK installation:
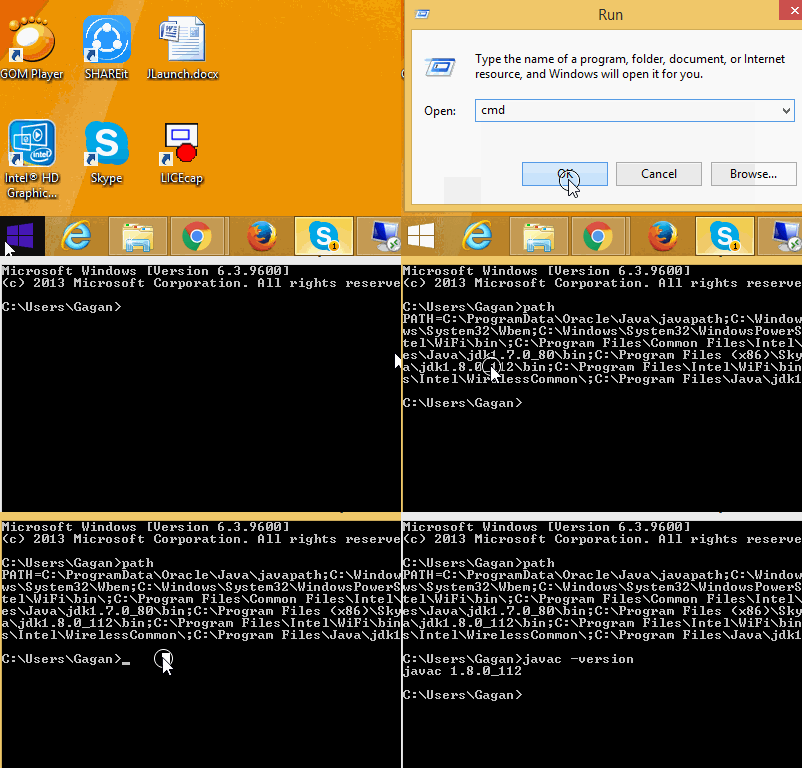
• Press “Start” to start.
• Click “Run”
• type ‘cmd’,
• Then press “Route” to start the job
• The contents of your JAVA_HOME>bin environment variable should show that it appears in the PATH.
• Run the following commands to verify that the JDK/JRE is installed correctly and display its version:
C:> Java version
C:>.Java version

Conclusion:
Unlock the Power of Java Today! Install JDK on Windows in Minutes. Get Started Now!


